


")


🚨 BACK EXERCISE FOR WOMEN
✅ Your little black dress is begging for a strong, sexy back. Perform these exercises and in less than a month, your upper body will shine in that low-backed stunner. It’s time to break out that backless number for a big night out, but is your rear view up to par? ✅ Have no fear! Whip your back into terrific shape with this effective machine-based workout, and in less than three weeks, you’ll be posing for coy, over-the-shoulder photos with the confidence actress.
[wp_ad_camp_2]
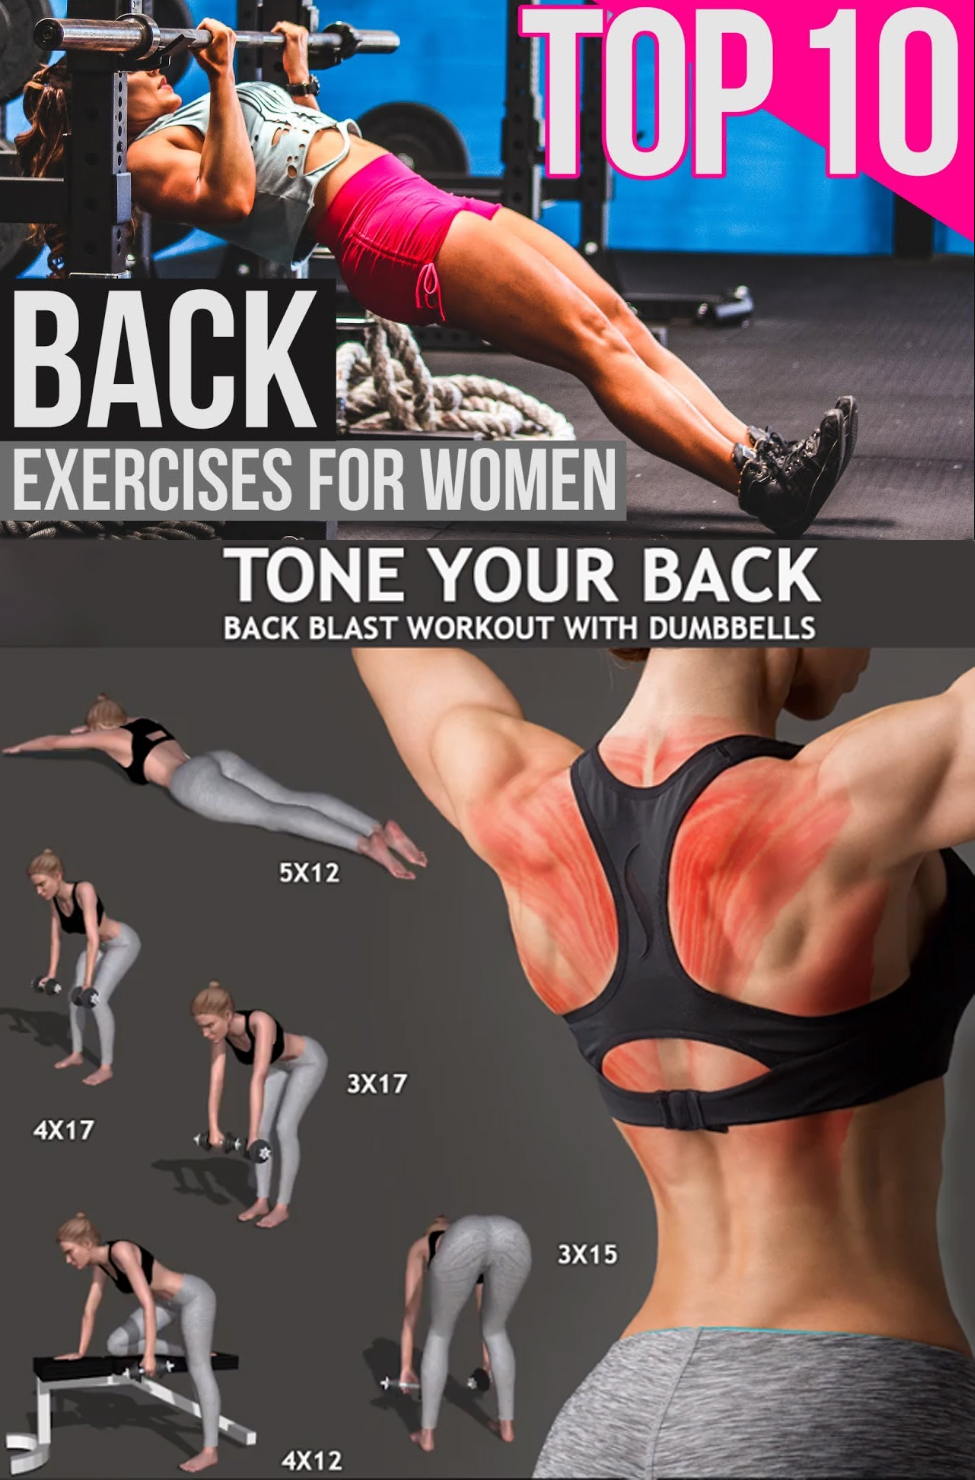
🔥 Besides looking great in a backless dress, your flip side is an important part of your physiology. Your back includes several large muscles and many smaller supportive ones – the latissimus dorsi, trapezius, rhomboids, teres major and rear deltoids, to name a few. Together, these muscles help you twist, turn, reach, pull, bend over and stand back up, and are an integral part of walking, running, throwing, rowing, jumping and just about any other activity you can imagine. This workout is designed to hit your entire back from top to bottom and side-to-side to build a balanced and beautiful back.
[wp_ad_camp_4]
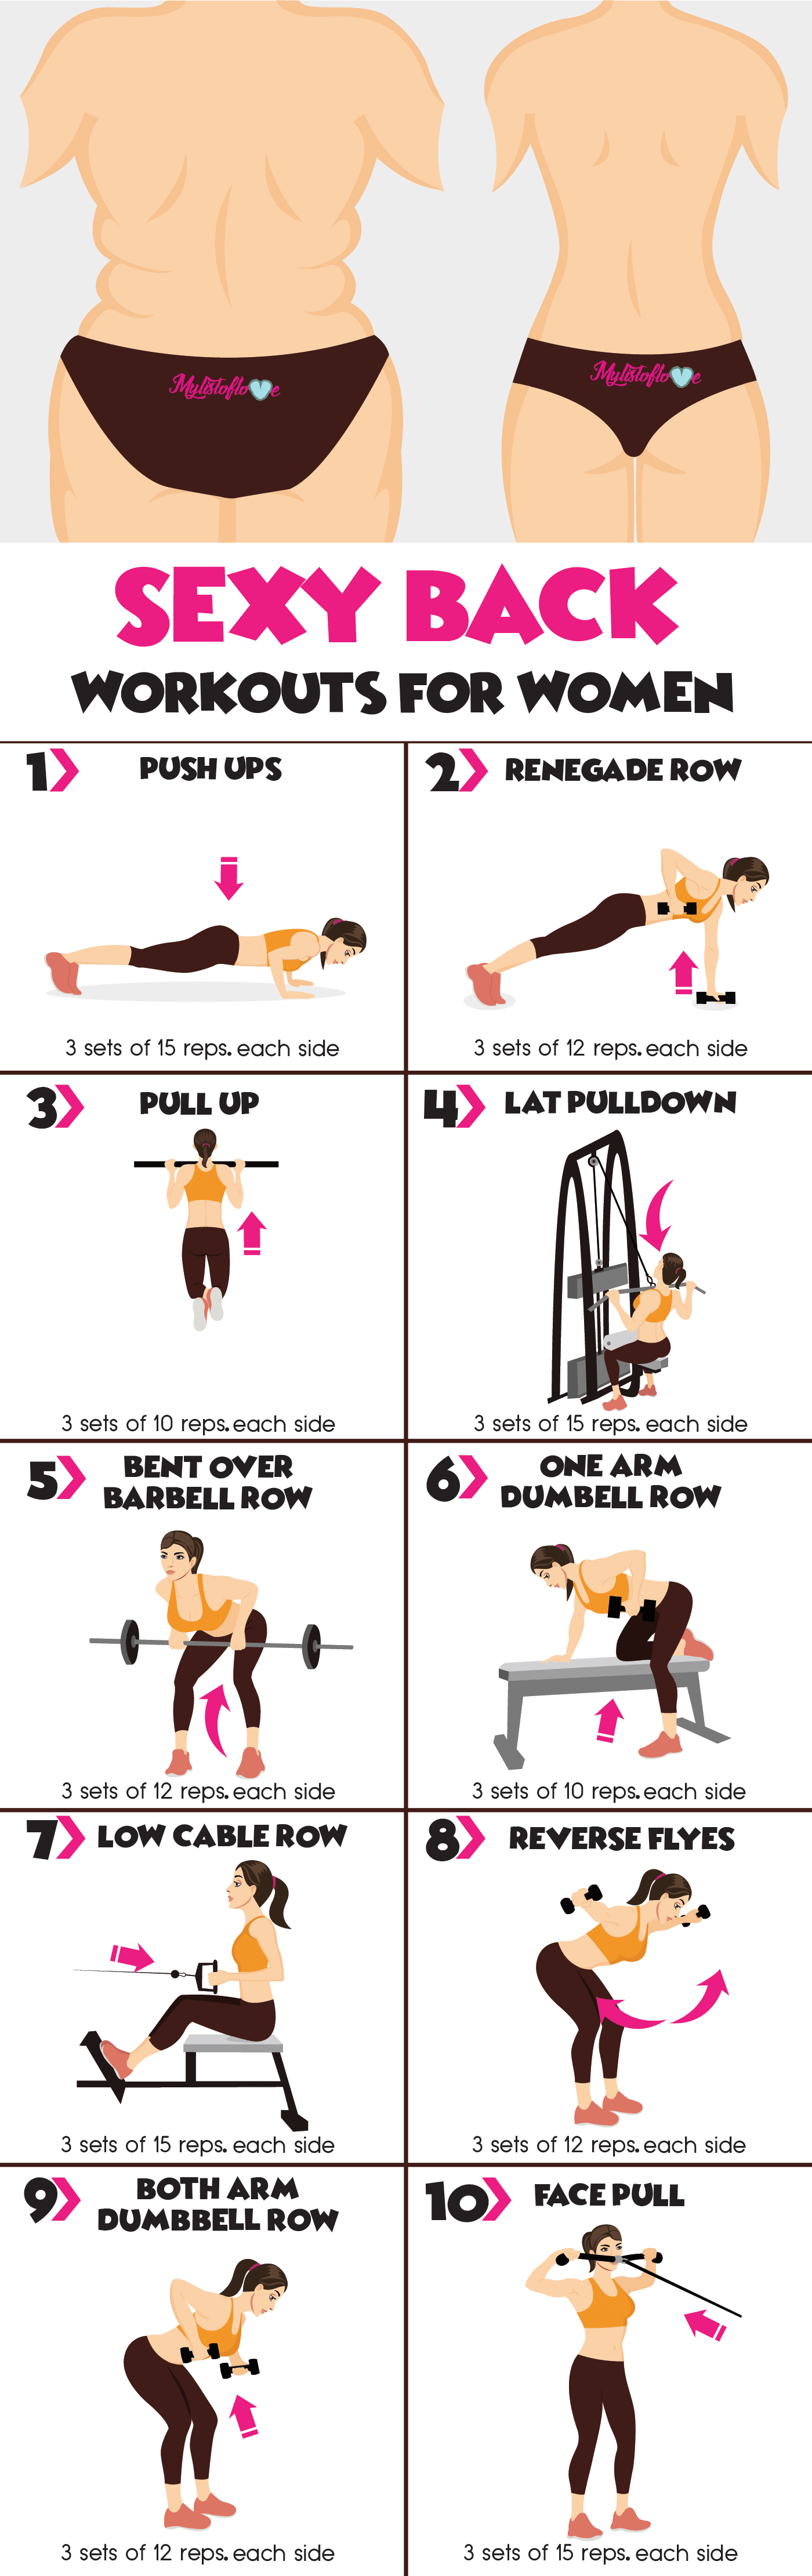
1) PUSH UPS:
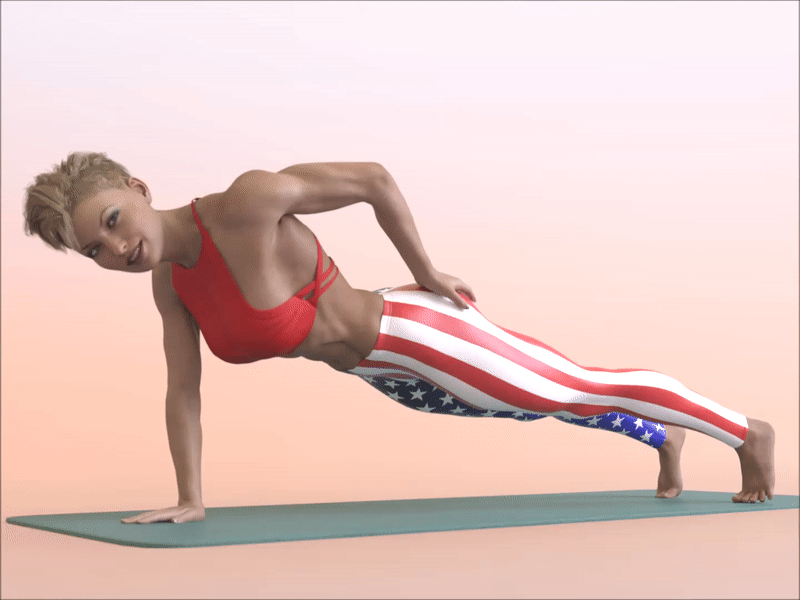
- To do: Get into plank position, with your hands under but slightly outside of your shoulders.
- Lower your body until your chest nearly touches the floor.
- As you lower yourself, tuck your elbows, pulling them close to your body so that your upper arms form a 45-degree angle when your torso is in the bottom position of the move.
- Pause, then push back to the starting position as quickly as possible. Keep your core braced the entire time.
- If your hips sag at any point during the exercise, your form has been broken. When this happens, consider that your last repetition and end the set.
2) CHIN UPS:
- Grab the pull-up bar with the palms facing your torso and a grip closer than the shoulder width.
- As you have both arms extended in front of you holding the bar at the chosen grip width, keep your torso as straight as possible while creating a curvature on your lower back and sticking your chest out. This is your starting position. Tip:Keeping the torso as straight as possible maximizes biceps stimulation while minimizing back involvement.
- As you breathe out, pull your torso up until your head is around the level of the pull-up bar. Concentrate on using the biceps muscles in order to perform the movement. Keep the elbows close to your body. Tip: The upper torso should remain stationary as it moves through space and only the arms should move. The forearms should do no other work other than hold the bar.
- After a second of squeezing the biceps in the contracted position, slowly lower your torso back to the starting position; when your arms are fully extended. Breathe in as you perform this portion of the movement.
- Repeat this motion for the prescribed amount of repetitions.
[wp_ad_camp_5]
3) RENEGADE ROW:
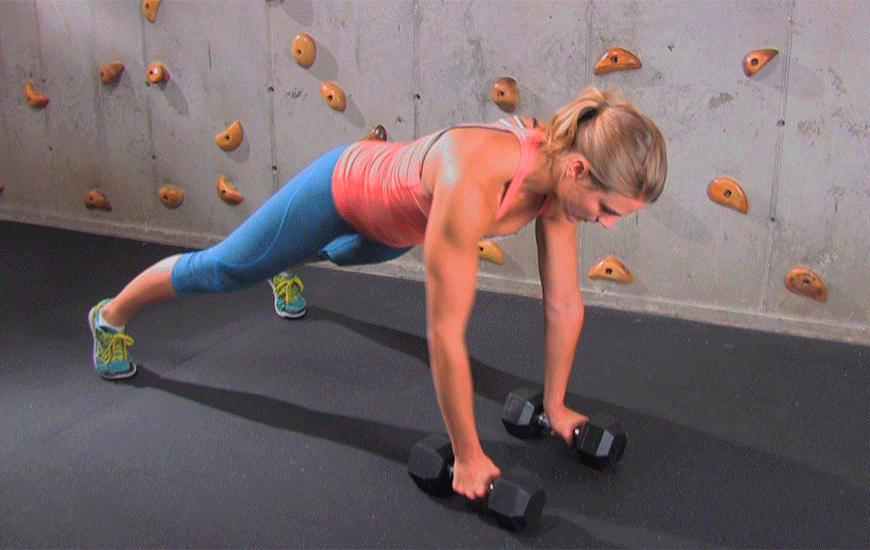
- Place two kettlebells on the floor about shoulder width apart. Position yourself on your toes and your hands as though you were doing a pushup, with the body straight and extended. Use the handles of the kettlebells to support your upper body. You may need to position your feet wide for support.
- Push one kettlebell into the floor and row the other kettlebell, retracting the shoulder blade of the working side as you flex the elbow, pulling it to your side.
- Then lower the kettlebell to the floor and begin the kettlebell in the opposite hand. Repeat for several reps.
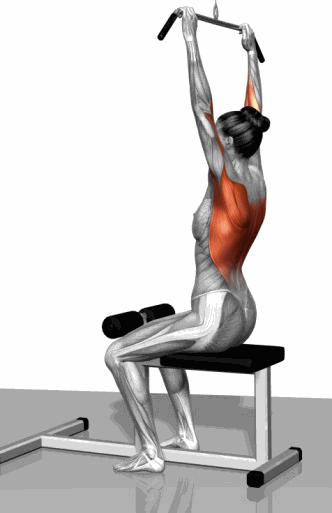
4) LAT PULLDOWNS:
[wp_ad_camp_1]
- Sit down on a pull-down machine with a wide bar attached to the top pulley. Make sure that you adjust the knee pad of the machine to fit your height. These pads will prevent your body from being raised by the resistance attached to the bar.
- Grab the bar with the palms facing forward using the prescribed grip. Note on grips: For a wide grip, your hands need to be spaced out at a distance wider than shoulder width. For a medium grip, your hands need to be spaced out at a distance equal to your shoulder width and for a close grip at a distance smaller than your shoulder width.
- As you have both arms extended in front of you holding the bar at the chosen grip width, bring your torso back around 30 degrees or so while creating a curvature on your lower back and sticking your chest out. This is your starting position.
- As you breathe out, bring the bar down until it touches your upper chest by drawing the shoulders and the upper arms down and back. Tip: Concentrate on squeezing the back muscles once you reach the full contracted position. The upper torso should remain stationary and only the arms should move. The forearms should do no other work except for holding the bar; therefore do not try to pull down the bar using the forearms.
- After a second at the contracted position squeezing your shoulder blades together, slowly raise the bar back to the starting position when your arms are fully extended and the lats are fully stretched. Inhale during this portion of the movement.
- Repeat this motion for the prescribed amount of repetitions.
Variations: The behind the neck variation is not recommended as it can be hard on the rotator cuff due to the hyperextension created by bringing the bar behind the neck.
5) BENT OVER BARBELL ROW:
[wp_ad_camp_4]
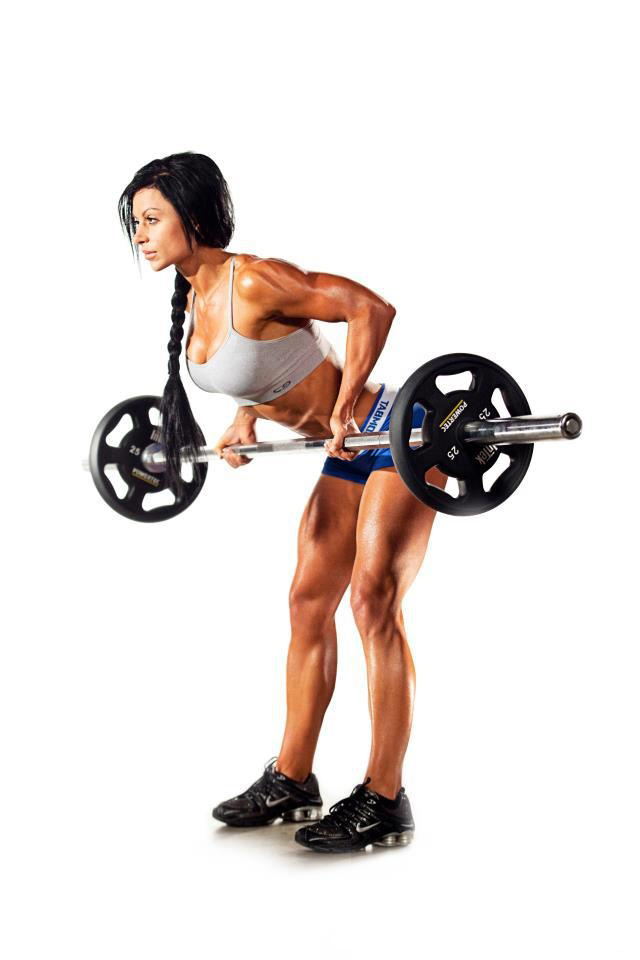
- Holding a barbell with a pronated grip (palms facing down), bend your knees slightly and bring your torso forward, by bending at the waist, while keeping the back straight until it is almost parallel to the floor. Tip: Make sure that you keep the head up. The barbell should hang directly in front of you as your arms hang perpendicular to the floor and your torso. This is your starting position.
- Now, while keeping the torso stationary, breathe out and lift the barbell to you. Keep the elbows close to the body and only use the forearms to hold the weight. At the top contracted position, squeeze the back muscles and hold for a brief pause.
- Then inhale and slowly lower the barbell back to the starting position.
- Repeat for the recommended amount of repetitions.
Caution: This exercise is not recommended for people with back problems. A Low Pulley Row is a better choice for people with back issues.
[wp_ad_camp_3]
Also, just like with the bent knee dead-lift, if you have a healthy back, ensure perfect form and never slouch the back forward as this can cause back injury.
Be cautious as well with the weight used; in case of doubt, use less weight rather than more.
Variations: You can perform the same exercise using a supinated (palms facing you) grip.
6) ONE ARM DUMBELL ROW:
- Choose a flat bench and place a dumbbell on each side of it.
- Place the right leg on top of the end of the bench, bend your torso forward from the waist until your upper body is parallel to the floor, and place your right hand on the other end of the bench for support.
- Use the left hand to pick up the dumbbell on the floor and hold the weight while keeping your lower back straight. The palm of the hand should be facing your torso. This will be your starting position.
- Pull the resistance straight up to the side of your chest, keeping your upper arm close to your side and keeping the torso stationary. Breathe out as you perform this step. Tip: Concentrate on squeezing the back muscles once you reach the full contracted position. Also, make sure that the force is performed with the back muscles and not the arms. Finally, the upper torso should remain stationary and only the arms should move. The forearms should do no other work except for holding the dumbbell; therefore do not try to pull the dumbbell up using the forearms.
- Lower the resistance straight down to the starting position. Breathe in as you perform this step.
- Repeat the movement for the specified amount of repetitions.
- Switch sides and repeat again with the other arm.
Variations: One-arm rows can also be performed using a high pulley or a low pulley instead of a dumbbell.
7) LOW CABLE ROW:
- For this exercise you will need access to a low pulley row machine with a V-bar. Note: The V-bar will enable you to have a neutral grip where the palms of your hands face each other. To get into the starting position, first sit down on the machine and place your feet on the front platform or crossbar provided making sure that your knees are slightly bent and not locked.
- Lean over as you keep the natural alignment of your back and grab the V-bar handles.
- With your arms extended pull back until your torso is at a 90-degree angle from your legs. Your back should be slightly arched and your chest should be sticking out. You should be feeling a nice stretch on your lats as you hold the bar in front of you. This is the starting position of the exercise.
- Keeping the torso stationary, pull the handles back towards your torso while keeping the arms close to it until you touch the abdominals. Breathe out as you perform that movement. At that point you should be squeezing your back muscles hard. Hold that contraction for a second and slowly go back to the original position while breathing in.
- Repeat for the recommended amount of repetitions.
Caution: Avoid swinging your torso back and forth as you can cause lower back injury by doing so.
Variations:
[wp_ad_camp_5]
You can use a straight bar instead of a V-Bar and perform with a pronated grip (palms facing down-forward) or a supinated grip (palms facing up-reverse grip).
8) REVERSE FLYES:
- To begin, lie down on an incline bench with the chest and stomach pressing against the incline. Have the dumbbells in each hand with the palms facing each other (neutral grip).
- Extend the arms in front of you so that they are perpendicular to the angle of the bench. The legs should be stationary while applying pressure with the ball of your toes. This is the starting position.
- Maintaining the slight bend of the elbows, move the weights out and away from each other (to the side) in an arc motion while exhaling. Tip: Try to squeeze your shoulder blades together to get the best results from this exercise.
- The arms should be elevated until they are parallel to the floor.
- Feel the contraction and slowly lower the weights back down to the starting position while inhaling.
- Repeat for the recommended amount of repetitions.
9) BOTH ARM DUMBELL ROW:
[wp_ad_camp_2]
- With a dumbbell in each hand (palms facing each other), bend your knees slightly and bring your torso forward, by bending at the waist, while keeping the back straight until it is almost parallel to the floor. Tip: Make sure that you keep the head up. The weights should hang directly in front of you as your arms hang perpendicular to the floor and your torso. This is your starting position.
- While keeping the torso stationary, lift the dumbbells to your side as you breathe out, squeezing your shoulder blades together. On the top contracted position, squeeze the back muscles and hold for a second.
- Slowly lower the weight again to the starting position as you inhale.
- Repeat for the recommended amount of repetitions.
10) FACE PULLS:
- Facing a high pulley with a rope or dual handles attached, pull the weight directly towards your face, separating your hands as you do so.
- Keep your upper arms parallel to the ground.


