🔥4 Best Ways to Row

✅ If you want to bulk up your upper body, you’ve probably asked yourself what’s the most effective ‘big lift’ you can use? If you thought it was the military press or the bench press, maybe you should try pulling instead of pushing every once in a while. When you do a classic barbell row, you outperform pretty much all other upper-body exercises in terms of becoming stronger and packing on lean muscle. Most trainers worth their salt will tell you that in order to reach these goals, you need to be pulling much more than pushing because due to the press-laden workout routines out there, you’ve probably got slightly hunched shoulders, let alone all the other hunching activities we do like texting, driving and typing which make your shoulders come to the front just a little bit more.
[wp_ad_camp_1]
1. 🔥 Barbell Row
The barbell row is the typical back exercise and a reference point for all other free-weight rows. All you need to think about with this exercise is keeping your body stable while you’re pulling that bar up to your stomach. The weight should be really heavy and your grip should be pronated, with your palms facing backwards. Your torso should be anywhere between parallel to the floor and inclined at 45 degrees.
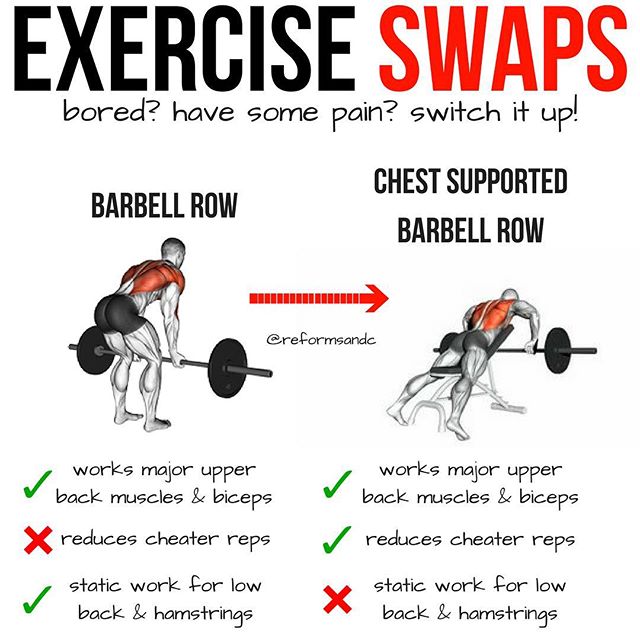
To do a barbell row, take a barbell with both hands, stand with a grip at shoulder-width, holding an overhand grip. Bend your knees just a little bit and your waist until you reach at least a 45 degree incline. The movement starts with the bar hanging down to the floor and your arms extended completely. To begin, bend your elbows and lift with your back muscles to pull the bar up to your abdomen, while keeping the rest of your body fully stationary. Squeeze your muscles when you get to the top and lower the bar back down. Do the barbell row as your first exercise in your back routine, or if that’s impossible, do it first right after pull-ups or heavy lat pull-downs.
2. 🔥 Reverse-Grip Barbell Row
This exercise was Dorian Yates’ favorite back builder, and since he won Mr. Olympia six times, we should all listen. He did it a little less inclined though, at 30 degrees to the floor, which is often referred to as the ‘Yates row’. Yates preferred the reverse-grip instead of the overhand grip because he thought it activated the lower lats more efficiently and allowed for a bigger range of motion when you got to the top of the rep. While supine rows may use the biceps sometimes, if you hone your mind-muscle connection you can build a hell of a back.

[wp_ad_camp_2]
Begin this exercise with the exact same position as the normal barbell row, with the only change being an underhand grip instead of an overhand grip. Bend your waist to a 45 degrees inclination and let your arms extend towards the floor, holding the barbell. Pull it up to your abdomen and keep lifting with an immobile torso. When you get to the top, squeeze your active muscles and lower the bar down. For the full effect, your elbows should be tight against your body. Do this exercise instead of barbell rows with a pronated grip as your first exercise or first rowing move, which means at most it should be your second exercise in your back routine.
3. 🔥 Dumbbell Row
The dumbbell row has the same motion as the barbell row, but when you use dumbbells you have a slightly extended range of motion when you get to the top of the movement because the bar is not hitting your abdomen. When using dumbbells, you can use a neutral hand position with your palms facing inwards, which will activate your back muscles a bit differently, and you can use a reverse grip too! Switching up your exercises means your muscles grow in new ways, so do it as much as possible!
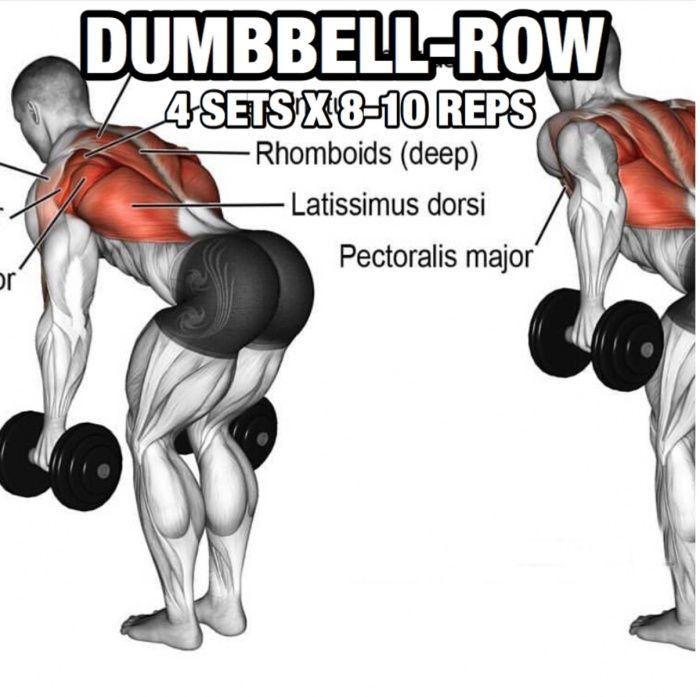
To perform this exercise, take two dumbbells and stand with slightly bent knees. Bend over at the waist until you are either parallel to the floor or at a 45 degree inclination to it. The dumbbells should be hanging down with your hands fully extended and your palms facing each other. Keep this angle and pull both of the dumbbells up together until they reach your waist. For a full contraction in your back, squeeze your shoulder blades together when you get to the top, then extend your arms towards the floor again. Do this exercise first on back day because your lower back will suffer the same amount as with a barbell.
[wp_ad_camp_4]
4. 🔥 T-Bar Row
This is the machine version of the normal barbell row, which means you can also do it on a Smith machine. It will be the same motion, but because the weight is set on a fixed path, you don’t have to spend extra energy stabilizing yourself. While some people say this diminishes the T-bar row’s functionality, it also lets you overload your large target muscles like your middle traps, rhomboids and laterals even more! This is because it doesn’t depend on stabilizing muscles.
Do this exercise by standing on the platform and have a shoulder-width stance with slightly bent knees. Lean forward and take an overhand, shoulder-width grip. Your arms should be extended towards the floor and your torso inclined to about 45 degrees. Activate your back muscles and pull as hard as you can while bending your elbows. Your chest needs to be out and your lower back arched, too! When you get to the top of the rep, squeeze your shoulder blades together and lower the weight down to its starting position. Do this exercise in the middle of your workout, especially when you want to switch between free weight and isolation exercises.
[wp_ad_camp_5]
✅ So, with all that said and done, here is a complete back workout based on rows.
- Barbell Rows for 4-5 sets, 6-8 reps each.
- Lat Pulldowns for 4 sets, 10 reps each.
- T-Bar Rows for 3 sets, 12 reps each.
- One-Arm Dumbbell Rows until burnout with 30 reps per side.


